

Showing posts with label chocolate. Show all posts
Showing posts with label chocolate. Show all posts
Monday, July 9, 2012
Easy Chocolate Sauce
A few weeks ago I had a friend over for an impromptu dinner in. I had some delicious ice cream in the freezer but felt like it needed a little something extra to make it even better.


Monday, May 21, 2012
Chocolate Fudge Ice Pops
Last week I came home from my grocery trip with an ice cream maker. This week I came home with ice pop molds. Sadly, I didn't really have any fruit or juice or typical ice pop fare hanging around to test them out. I came across this recipe on the Epicurious app and, since I did have all of the ingredients for these at home, this became my test batch.


Monday, April 9, 2012
Bites from the 'Burg - Suzy Q Doughnuts
Happy Easter (Monday)! I decided my co-workers probably wouldn't be too appreciative of a bunch of baking the day after Easter so, instead of making something new, I thought I'd tell you about one of my favorite places in my neighborhood - Suzy Q Doughnuts.
 |
| Sugar Munkki |
Wednesday, March 21, 2012
Wordless Wednesday: Choco-Frito
 |
| Yeast doughnut, chocolate glaze, and crushed Fritos |
iPhone with Instagram
Monday, March 19, 2012
Irish Cream Bars
As per usual, I'm posting a holiday-related recipe after the holiday it was intended for. At least I'm consistent.I present St. Patrick's Day Bailey's bars.

Monday, March 12, 2012
Chocolate Coconut Doughnuts
I've had doughnuts on the brain lately. With Suzy Q's opening up around the corner from my place, and the endless Twitter chatter about their delicious doughnuts, they seem to be constantly in the back of my mind these days.

Monday, March 5, 2012
Banoffee Pie
I have something to share with you. I don't like bananas. As much as I try, I can't learn to love them. However, I dream about this dessert. Banana + toffee = banoffee.

Monday, February 13, 2012
Chocolate Glazed Peanut Butter Doughnuts
It only seemed right to post something for Valentine's day and, unlike most other holidays, I actually managed to get it posted before the holiday so you can try to make these for your Valentine.


Wednesday, January 18, 2012


Monday, January 16, 2012
Butterscotch Peanut Butter Marshmallow Squares
When I was younger, I remember I always avoided these squares when I saw them on a dessert tray. I'm not really sure why. It could have been my aversion to most things butterscotch but I'm glad I eventually gave them a chance.


Monday, January 9, 2012
Kristen's "Pain au Chocolat"
This Christmas was the first one that I have spent away from my parents. It was just more practical for my brother and I to stay in Ottawa this year rather than make the trip back to PEI like we normally do. Since it was going to be a bit of a different Christmas for me, my friends were very thoughtful and did different things to make my Christmas morning special.

 |
| My Christmas morning |
Wednesday, December 21, 2011
Chocolate Mint Crackles
These are one of my favorite holiday cookies. I discovered this chocolate mint concoction in a Better Homes and Gardens "best of" cookie book that I bought at Costco a few years ago.

For those of you familiar with Tim Horton's, I would describe these as tasting like a chocolate glaze timbit if you were to add mint to it. There's almost a cakey texture to the cookie which is what I love about them. They're crisp on the outside and slightly chewy on the inside, full of chocolate, and delicious all around.
Chocolate Mint Crackles
from the Better Homes and Gardens' The Ultimate Cookie Book
makes 36 to 48 cookies
Stir together dry ingredients and set aside.
In a microwave safe bowl, melt one cup of chocolate chips. Microwave for 30 seconds and stir. Repeat at 30 second intervals until the chips are melted. Set aside.

I find the easiest way to coat the cookies in the icing sugar is to put about a cup or so of sugar into a plastic container with a tight fitting lid. Add the dough balls, secure the lid, and shake. You can also just put the sugar into a bowl and toss the dough around with a spoon or your hands until coated.
The finished product is best eaten within a day or two. They don't freeze particulary well because of the icing sugar, but you can make the dough balls in advance and freeze those. Thaw for a few hours in the fridge, roll in sugar, and you're good to go.
Chocolate and mint can be a polarizing combination. Do you love it or loathe it?

For those of you familiar with Tim Horton's, I would describe these as tasting like a chocolate glaze timbit if you were to add mint to it. There's almost a cakey texture to the cookie which is what I love about them. They're crisp on the outside and slightly chewy on the inside, full of chocolate, and delicious all around.
Chocolate Mint Crackles
from the Better Homes and Gardens' The Ultimate Cookie Book
makes 36 to 48 cookies
- 1 1/2 cups all-purpose flour
- 1 1/2 teaspoons baking powder
- 1/4 teaspoon salt
- 1 1/2 cups semisweet chocolate chips
- 6 tablespoons butter, softened
- 1 cup white sugar
- 2 eggs
- 1 1/2 teaspoons vanilla
- 1/4 to 1/2 teaspoon mint extract
- 1 to 2 cups icing sugar for rolling
Stir together dry ingredients and set aside.
In a microwave safe bowl, melt one cup of chocolate chips. Microwave for 30 seconds and stir. Repeat at 30 second intervals until the chips are melted. Set aside.
With a stand
mixer (or hand mixer) beat butter until fluffy. Add sugar and mix until combined.
Add eggs, vanilla, and mint. Combine the melted chocolate into the
butter/sugar/egg mixture. Add the dry ingredients slowly and mix on low speed.
When incorporated, add the remaining ½ cup of chocolate chips. The dough gets pretty stiff so I recommend you use a stand mixer if you've got one.
Chill the
dough for an hour or more until it firms up a bit. Using a tablespoon scoop (or
a spoon) roll dough into balls about 1 inch in diameter. Toss dough balls in
icing sugar and place about 2 inches apart on parchment lined cookie sheets.
Bake at 350F
for about 10 to 12 minutes until the tops are cracked. Transfer to a wire rack
to cool.

I find the easiest way to coat the cookies in the icing sugar is to put about a cup or so of sugar into a plastic container with a tight fitting lid. Add the dough balls, secure the lid, and shake. You can also just put the sugar into a bowl and toss the dough around with a spoon or your hands until coated.
The finished product is best eaten within a day or two. They don't freeze particulary well because of the icing sugar, but you can make the dough balls in advance and freeze those. Thaw for a few hours in the fridge, roll in sugar, and you're good to go.
Chocolate and mint can be a polarizing combination. Do you love it or loathe it?
Monday, December 5, 2011
Chocolate Toffee Bark
This delicious treat is also known across the internet as "chocolate crack". I had a friend visiting from out of town this weekend and I wanted to pull together something pretty quick and delicious to share with her and this is what I chose.

This is one of those recipes that is in SO MANY different places on the internet that it's impossible to know where it started out. This is my version of the classic recipe.
Chocolate Toffee Bark


This is one of those recipes that is in SO MANY different places on the internet that it's impossible to know where it started out. This is my version of the classic recipe.
Chocolate Toffee Bark
- 1 cup butter
- 1 cup brown sugar
- pinch of salt
- one package chocolate chips
- one box of graham crackers
- 1/2 cup toasted chopped nuts
Line a large cookie sheet with foil and parchment. This makes cleaning up so much easier. Fill the sheet with graham crackers (or saltine/soda crackers) to cover the whole bottom.

Mix the butter and sugar together over medium heat until the butter melts and starts to bubble. The mixture won't really combine and come together until it starts to boil. Once it comes to a boil mix constantly for about five minutes and pour over the crackers.


Bake in a 350 degree oven for about 5 to 8 minutes until bubbly and heated through.

Sprinkle the chocolate chips over the top and let sit for a few minutes until the chocolate melts. You'll see the color change from chalky to shiny. When the chocolate's melted, spread across the top of the toffee.

Sprinkle with whatever toppings you'd like. I used chopped nuts and sea salt. I read a version of the recipe today that used crushed candy canes. Totally up to you.

Let the toffee cool a bit and then put it in the fridge until solid, about an hour. Break it up into smaller pieces and you're ready to go. I usually keep this in a large cookie tin in the fridge to keep the chocolate and toffee solid. The upside is that this stuff is delicious. The downside is that this stuff is so delicious that I can't stop eating it when it's in the house. As soon as the weekend was over I was forced to take the leftovers to work and keep them there so I wouldn't finish off the batch by myself. This is a great, easy treat to take to any holiday gathering.

Have you ever made a batch of chocolate "crack"?
Monday, November 21, 2011
Chocolate Mint Cupcakes
This past weekend I got to meet up with some people from my neighborhood (who I've met through Twitter) for a doughnut taste off at one of our local restaurants. The plan was for them to try my baked caramel apple doughnuts and for me to get to try the restaurant's delicious fried yeast doughnuts. However, me being me, I decided making only doughnuts was not enough and I got ambitious and made some cupcakes as well.

May I present my chocolate buttermilk cupcakes with peppermint buttercream. Mmm. This recipe combination has been in my head for awhile now. I was planning to wait and make them for an upcoming holiday party but I just couldn't hold out that long. It combines two of my favorite go-to recipes into one.
I've posted about this chocolate cupcake recipe a few times before but I'm not sure I've actually posted the recipe. It's my favorite because it's super simple. I can just whisk it together by hand and it only makes a dozen cupcakes so it's great for feeding a smaller group.
Martha Stewart's Chocolate Buttermilk Cupcakes
from marthastewart.com
makes 12 cupcakes
- 3/4 cup all-purpose flour
- 3/4 cup sugar
- 1 teaspoon baking powder
- 1/2 teaspoon baking soda
- 1/4 teaspoon salt
- 6 tablespoons unsweetened cocoa powder
- 3 tablespoons unsalted butter, melted
- 6 tablespoons buttermilk
- 1 large egg
- 1 large egg white
Preheat oven to 350 degrees. Line a 12-cup muffin tin with paper liners. In a large mixing bowl,
combine flour, sugar, baking powder, baking soda, and salt; set aside.
With an electric mixer or whisk, combine cocoa and 3 tablespoons hot water until a thick paste forms. Add butter, buttermilk, egg, and egg white; beat until combined. Whisk in flour mixture until smooth.
Scoop (or spoon) batter into prepared tin. Bake until a toothpick inserted in the center of a cupcake comes out clean, about 15-20 minutes. Transfer cupcakes to a wire rack to cool completely.


Martha's Fluffy Buttercream
modified from marthastewart.com
enough to frost 12 cupcakes
- 3/4 butter, softened
- 2 cups sifted confectioners' sugar
- 1 teaspoon peppermint extract

This is how I get the frosting into the piping bag. Just put the bag into a tall glass and fold the top over the outside of the glass to keep the top open. This leaves both hands free to get the frosting into the piping bag. So much easier this way. My favorite glass to use is a pint glass from a local brewery. It's just the right size for the disposable piping bags.
And here's the finished product...


I sprinkled some crushed candy cane on top to finish them off. These were most definitely a hit. I had some friends over later in the day and they were arguing over who was going to get the last one. I'm not usually huge on mint, or frosting, but I was eating the leftovers straight out of the piping bag. It's pretty unusual for me. Sometimes all it takes is a slight change to a recipe that you're already really familiar with to make it something totally different and so much better. I wouldn't have thought a little mint extract could be so delicious.
Have you ever made a small change to a recipe that made a really big difference to the flavor?
Friday, November 18, 2011
Mixed Up: President's Choice Whoopie Pie Mix
This week I thought I'd try something a little different. I made something from a boxed mix. I'll admit, I was feeling a little bit lazy and the idea of making something from a package was ridiculously appealing. Just dump, mix, and you're ready to go, right?

I saw the new President's Choice whoopie pie mix in the Holiday Insider's Report earlier this month and thought I'd give it a try. Whoopie pies are all the rage these days. The cake seems easy enough but the marshmallowy filling has always frightened me. The "just add water" aspect of the filling part of the mix seemed super appealing to me.


The recipe itself seemed simple enough. Minimal extra ingredients to add to the prepared mix.

My one tip for the cake mix would be not to bother with using the electric beaters. They didn't do a great job of mixing the thick batter and it was just one more thing to get out of the cupboard and wash later on. I think a spatula or whisk would work just fine.

To get consistently sized cookies, I used my one tablespoon cookie scoop. I bought that scoop when I was making hundreds of mini cupcakes for a wedding. I thought I'd never use it again but it's become one of the most used tools in my kitchen. Well worth the $12 I almost didn't pay for it.

The cookies came out perfectly smooth and very evenly sized and shaped. I got 30 cookies.

The filling mix just required the addition of 1/4 cup of water and into the mixer. For this step I would recommend a stand mixer if you have one. It's so much easier to just set the mixer on high and walk away for the three to five minutes instead of standing at the counter with a hand mixer.
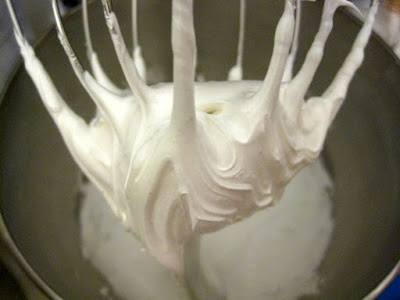
The result was a super gooey, fluffy, glossy, vanilla bean laden filling.

I used a piping bag to get the filling onto the cookies. It just seemed like the least messy way to go about it. I was pretty generous with the filling and still had quite a bit leftover.


They turned out picture perfect. They really couldn't look more like the ones on the box. My main complaint was the taste. I thought they were revolting. The mix had a serious chemical smell to it, as did the finished product. I took one bite and I was done. There was some flavor in them that I just couldn't place but I knew I despised.
I took them to work to get a second opinion and was surprised by what people said - they liked them! One so much so that she asked for the name of the mix so she could make them for herself. I tried one again today and found that the cake had a better flavor but the filling still tasted weird to me.
All in all, I don't think I'd make these again. It was nice not to have to measure out ingredients but the taste wasn't worth any of the trouble I saved. At $2.99 they might be worth checking out if you're in a pinch.
Have you ever been grossed out by a prepared food that you thought was going to be tasty?

I saw the new President's Choice whoopie pie mix in the Holiday Insider's Report earlier this month and thought I'd give it a try. Whoopie pies are all the rage these days. The cake seems easy enough but the marshmallowy filling has always frightened me. The "just add water" aspect of the filling part of the mix seemed super appealing to me.


The recipe itself seemed simple enough. Minimal extra ingredients to add to the prepared mix.

My one tip for the cake mix would be not to bother with using the electric beaters. They didn't do a great job of mixing the thick batter and it was just one more thing to get out of the cupboard and wash later on. I think a spatula or whisk would work just fine.

To get consistently sized cookies, I used my one tablespoon cookie scoop. I bought that scoop when I was making hundreds of mini cupcakes for a wedding. I thought I'd never use it again but it's become one of the most used tools in my kitchen. Well worth the $12 I almost didn't pay for it.

The cookies came out perfectly smooth and very evenly sized and shaped. I got 30 cookies.

The filling mix just required the addition of 1/4 cup of water and into the mixer. For this step I would recommend a stand mixer if you have one. It's so much easier to just set the mixer on high and walk away for the three to five minutes instead of standing at the counter with a hand mixer.

The result was a super gooey, fluffy, glossy, vanilla bean laden filling.

I used a piping bag to get the filling onto the cookies. It just seemed like the least messy way to go about it. I was pretty generous with the filling and still had quite a bit leftover.


They turned out picture perfect. They really couldn't look more like the ones on the box. My main complaint was the taste. I thought they were revolting. The mix had a serious chemical smell to it, as did the finished product. I took one bite and I was done. There was some flavor in them that I just couldn't place but I knew I despised.
I took them to work to get a second opinion and was surprised by what people said - they liked them! One so much so that she asked for the name of the mix so she could make them for herself. I tried one again today and found that the cake had a better flavor but the filling still tasted weird to me.
All in all, I don't think I'd make these again. It was nice not to have to measure out ingredients but the taste wasn't worth any of the trouble I saved. At $2.99 they might be worth checking out if you're in a pinch.
Have you ever been grossed out by a prepared food that you thought was going to be tasty?
Tuesday, October 25, 2011
Jacques Pépin’s Chocolate Mousse
I got an email last week inviting me to enter a contest in celebration of famous French chef Jacques Pépin’s new book, Essential Pépin. We were given three recipes to choose from and, of course, I gravitated towards the only dessert on the list - classic chocolate mousse.


Here are the small changes I made to the recipe:
I feel like I cheated a little bit by only making half of the recipe. I didn't have anyone to share this delicacy with and didn't figure I needed to have six (rather generous) servings of chocolate mousse around the house this week. I don't think I had any problems relating from cutting it in half. If you're feeding a smaller group, probably up to four, you can definitely get away with half. This stuff is delicious but super rich, even to me who usually can't get enough of sweets in any form. All in all, this recipe was a lot easier to pull together than I anticipated considering it's a French classic from a classic French chef.
Have you ever taken on a recipe that you thought might be intimidating?

I used to watch Jacques Pépin on PBS all the time when I was younger. My favorite of his shows had to be Julia and Jacques Cooking at Home with Julia Child. Those two cracked me up when they were cooking together. It was kind of an odd dynamic that just worked. At the time, I never imagined I'd ever make any of his recipes. As a teenager they just seemed so complicated and way beyond my skills. Turns out I've come a long way since then because this recipe didn't seem too bad at all and I knew I had to take advantage of the opportunity to enter.
Chocolate Mousse
From Jacques Pépin’s Essential Pépin
Serves 6
- 1/3 cup sugar
- 4 large egg yolks
- 10 ounces bittersweet or semisweet chocolate, melted
- 2 cups heavy cream
- 2 teaspoons cognac (or another liqueur like Grand Marnier)
Reserve 2 tablespoons of the sugar, and combine the rest of the sugar with the egg yolks in a stainless steel bowl. Place the bowl in a skillet of hot tap water (or use a double boiler), and whisk the mixture for 3 minutes, or until it is fluffy, smooth, and at least doubled in volume.
Beat the reserved sugar with the cream in a large chilled bowl for a few minutes, or until soft peaks form; do not overwhip. Transfer about 3/4 cup of the whipped cream to another bowl to use as a decoration, and refrigerate.
Using a rubber spatula, combine the melted chocolate with the yolk mixture and the cognac. If the mixture starts to seize or break down, immediately stir in 1 to 2 tablespoons of the whipped cream to smooth out the mixture. Gently fold in the remaining whipped cream until incorporated. Transfer the mousse to a decorative bowl, cover, and refrigerate until set, at least 2 hours.
At serving time, whip the reserved 3/4 cup whipped cream until stiff peaks form. Spoon the cream into a pastry bag fitted with a star tip and decorate the top of the mousse with the cream, or spoon dollops of the cream onto the top of the mousse. Serve.

 |
| Hot tap water in a skillet to cook the yolks |
 |
| Before whisking |
 |
| After three minutes |
 |
| My best attempt at folding the egg, chocolate, and whipped cream together without deflating |


Here are the small changes I made to the recipe:
- I only made half of the recipe based on what I had on hand and who was going to be around to share with me.
- I used Kahlua instead of cognac. It's what I had in the house and coffee is a classic pairing with chocolate.
- The dark chocolate bar I bought was only the equivalent of about 3.5 ounces. I made up the balance of the 5 ounces I needed with good quality semi sweet chocolate chips.
I feel like I cheated a little bit by only making half of the recipe. I didn't have anyone to share this delicacy with and didn't figure I needed to have six (rather generous) servings of chocolate mousse around the house this week. I don't think I had any problems relating from cutting it in half. If you're feeding a smaller group, probably up to four, you can definitely get away with half. This stuff is delicious but super rich, even to me who usually can't get enough of sweets in any form. All in all, this recipe was a lot easier to pull together than I anticipated considering it's a French classic from a classic French chef.
Have you ever taken on a recipe that you thought might be intimidating?
Thursday, October 6, 2011
Chocolate Covered Peanut Butter Treats
As I've mentioned here before, I love chocolate and peanut butter and I love Resse's Peanut Butter cups. Every holiday season they come out with a different shape to celebrate the season. Pumpkins for Halloween, trees for Christmas, and eggs for Easter. There's something about the chocolate to peanut butter ratio of these treats that makes me love them just that much more than regular peanut butter cups.

I share this love of holiday peanut butter shapes with one of my previous coworkers (hi Lesley!). We used to pick up extras when we saw them to share with the other. While these treats are super delicious, they're not always that easy to find around here.

That's why, when I saw this recipe link on Serious Eats the other day, I knew I was going to have to try them for myself. Unfortunately, the only pumpkin cutter I could find was way too big for these so I had to settle for my other festive shapes (owls and bats) and a random flowery shaped thing. The recipe follows below.

That's why, when I saw this recipe link on Serious Eats the other day, I knew I was going to have to try them for myself. Unfortunately, the only pumpkin cutter I could find was way too big for these so I had to settle for my other festive shapes (owls and bats) and a random flowery shaped thing. The recipe follows below.
Homemade Chocolate Peanut Butter Pumpkins
slightly adapted from Miss Make via Serious Eats
1 cup creamy peanut butter
1/4 cup butter, softened
2 cups unsifted powdered sugar
12 oz chocolate chips (I used half semi-sweet and half milk chocolate)
1 tbsp shortening
In a large bowl mix together peanut butter, butter and powdered sugar until crumbly.


Turn out onto a cutting board and knead until it comes together and you feel like it can be rolled out.

Roll dough out on a parchment lined surface to a generous 1/4" thickness. Using a small cookie cutter, cut out your shapes. Use whatever shape you've got - I had flowers, owls and bats. Gather the scraps together and roll out again. Continue until you've used all the dough.

Place the cut out shapes in the freezer. Meanwhile, in a glass bowl (or over a double boiler) melt chocolate and shortening in the microwave 30 seconds at a time until smooth and liquidy.

Using a fork, dunk each frozen pumpkin in the chocolate, shaking off the excess. Place the dipped shapes on a parchment or wax paper lined baking sheet and refrigerate until set.

The finished product should look something like this.

These were delicious. So chocolatey and peanut buttery and so soft and melty. I really enjoyed them and they were pretty easy to make. They took a little longer to get together than I thought they would but it was worth it. My coworkers seemed to like them. I had at least one request for the recipe and that's always a good sign. The only issue I had with them was that they got really soft after a short time out of the fridge. If you aren't planning to serve them fairly soon after they come of out the fridge I would suggest maybe adding a little bit of wax to the chocolate to help keep them firm. I will certainly pull these out for the next major holiday.
Do you have a favorite holiday version of a classic treat?
Subscribe to:
Posts (Atom)
