Monday, October 31, 2011

Happy Halloween: Meringue Ghosts and Pumpkins

I had grand plans for what I was going to make for the office Halloween party. We have a contest every year and, being on of the resident bakers in the office, I feel like I need to make something impressive. When it came time to actually make the fantastic cupcakes I'd planned, I bailed. On Friday I saw a picture on Twitter posted by Karlynn Johnston of Kitchen Magpie (@KitchenMagpie) of the adorable meringue ghosts she was making for her Halloween party. Instantly, I changed my plans and decided to make these instead.


Martha Stewart has a Halloween recipe on her site for meringue bones. I used that recipe to make these ghosts and also some pumpkins (that don't really look like pumpkins). 

Meringue Ghosts
Using Martha Stewart's Sweet Bones recipe 
6 large egg whites (I used 7)
1 1/2 cups sugar
1 teaspoon vanilla (my addition)
  • Preheat oven to 200 degrees. Put egg whites and sugar in the heatproof bowl of an electric mixer. Set bowl over a pan of simmering water; whisk constantly until sugar is dissolved and mixture feels warm to the touch, about 5 minutes.
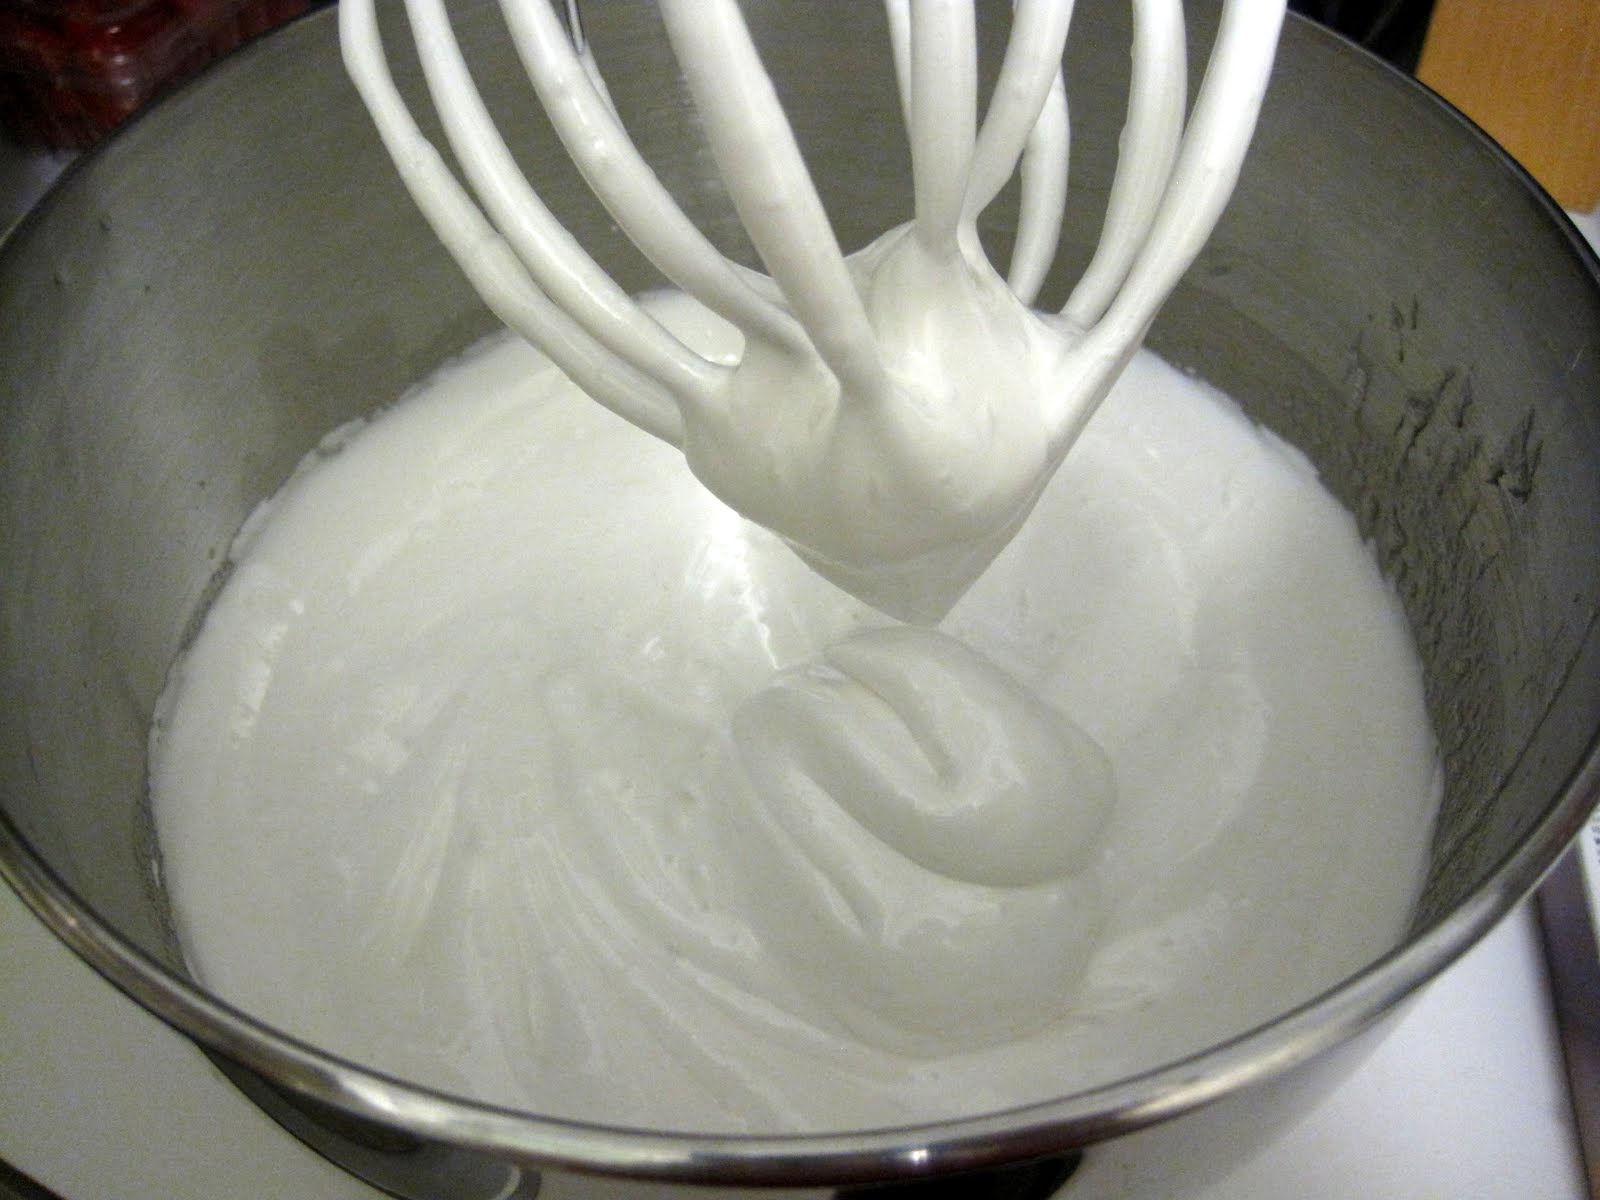
  • Return bowl to mixer, and fit mixer with the whisk attachment. Beat on high speed until very stiff peaks form, about 8 minutes.
  • Transfer meringue to a pastry bag fitted with a 1/2-inch plain round tip, such as a Wilton #1A . Pipe ghost shapes onto baking sheets lined with parchment paper. Bake until crisp throughout, about 1 hour. Let cool completely on a wire rack.

About half way through the whisking. Still pretty soft peaks.

After the full 8 minutes on high speed. Nice and stiff.

Decorating supplies - food coloring, candy sticks, piping bags, chocolate chips, and chocolate covered sunflower seeds

I didn't have a big enough round tip so I just cut the end off the piping bag. For the pumpkins I used a Wilton 1M tip.

Pre-decoration ghosts


Lesson learned today - don't try to make white meringue orange using normal liquid food coloring. I can see why the chefs on TV recommend the gel coloring. What I made was really a salmony pink color. I think the wonders of photo editing let me make these look remotely close to orange. 
 
Pumpkins. Hey, I tried.

Slightly peachy looking pumpkin.

Wish me luck in the contest. I think I'm going to need it!

Did you make any treats for Halloween this year?

Wednesday, October 26, 2011

Wordless Wednesday: Halloween Past

A blast from Halloween Past - Eyeball Cake

Tuesday, October 25, 2011

Jacques Pépin’s Chocolate Mousse

I got an email last week inviting me to enter a contest in celebration of famous French chef Jacques Pépin’s new book, Essential Pépin. We were given three recipes to choose from and, of course, I gravitated towards the only dessert on the list - classic chocolate mousse.


I used to watch Jacques Pépin on PBS all the time when I was younger. My favorite of his shows had to be Julia and Jacques Cooking at Home with Julia Child. Those two cracked me up when they were cooking together. It was kind of an odd dynamic that just worked. At the time, I never imagined I'd ever make any of his recipes. As a teenager they just seemed so complicated and way beyond my skills. Turns out I've come a long way since then because this recipe didn't seem too bad at all and I knew I had to take advantage of the opportunity to enter. 

Chocolate Mousse
From Jacques Pépin’s Essential Pépin
Serves 6
  • 1/3 cup sugar
  • 4 large egg yolks
  • 10 ounces bittersweet or semisweet chocolate, melted
  • 2 cups heavy cream
  • 2 teaspoons cognac (or another liqueur like Grand Marnier)
Reserve 2 tablespoons of the sugar, and combine the rest of the sugar with the egg yolks in a stainless steel bowl. Place the bowl in a skillet of hot tap water (or use a double boiler), and whisk the mixture for 3 minutes, or until it is fluffy, smooth, and at least doubled in volume.

Beat the reserved sugar with the cream in a large chilled bowl for a few minutes, or until soft peaks form; do not overwhip. Transfer about 3/4 cup of the whipped cream to another bowl to use as a decoration, and refrigerate.

Using a rubber spatula, combine the melted chocolate with the yolk mixture and the cognac. If the mixture starts to seize or break down, immediately stir in 1 to 2 tablespoons of the whipped cream to smooth out the mixture. Gently fold in the remaining whipped cream until incorporated. Transfer the mousse to a decorative bowl, cover, and refrigerate until set, at least 2 hours.

At serving time, whip the reserved 3/4 cup whipped cream until stiff peaks form. Spoon the cream into a pastry bag fitted with a star tip and decorate the top of the mousse with the cream, or spoon dollops of the cream onto the top of the mousse. Serve.


Hot tap water in a skillet to cook the yolks

Before whisking
 
After three minutes

My best attempt at folding the egg, chocolate, and whipped cream together without deflating


Here are the small changes I made to the recipe:
  • I only made half of the recipe based on what I had on hand and who was going to be around to share with me.
  • I used Kahlua instead of cognac. It's what I had in the house and coffee is a classic pairing with chocolate. 
  • The dark chocolate bar I bought was only the equivalent of about 3.5 ounces. I made up the balance of the 5 ounces I needed with good quality semi sweet chocolate chips. 
The one thing I'd always been worried about when watching TV chefs making chocolate mousse was ending up with scrambled eggs when cooking the egg yolks. I really appreciated the tip about filling the skillet with hot water instead of using a double boiler. The one mistake I think I made was not mixing the chocolate vigorously enough with the whipped egg mixture. The texture looked and felt right but I did end up with some solid bits of chocolate in the mousse that I don't think were supposed to be there. Delicious nonetheless.

I feel like I cheated a little bit by only making half of the recipe. I didn't have anyone to share this delicacy with and didn't figure I needed to have six (rather generous) servings of chocolate mousse around the house this week. I don't think I had any problems relating from cutting it in half. If you're feeding a smaller group, probably up to four, you can definitely get away with half. This stuff is delicious but super rich, even to me who usually can't get enough of sweets in any form. All in all, this recipe was a lot easier to pull together than I anticipated considering it's a French classic from a classic French chef.

Have you ever taken on a recipe that you thought might be intimidating?

Monday, October 24, 2011

Pumpkin Spice Cream Cheese

A few weeks ago I had some pumpkin leftover from other recipes and had to figure out what to do with it. I felt too guilty to throw it away. I remembered that I had some leftover cream cheese that also needed to be used up and this recipe came to mind. I'd printed it off along time ago and hadn't gotten around to trying it out yet. 


The recipe really couldn't be easier. Throw a few ingredients in a bowl, mix together, and enjoy! 

Pumpkin Spice Cream Cheese
Slightly Modified from Gina's Weight Watcher Recipes

  • 8 oz light cream cheese
  • 1/2 cup canned pureed pumpkin
  • 1 tsp vanilla
  • 1 tsp cinnamon
  • 1 tsp pumpkin pie spice
  • 2 tbsp brown sugar
  • 1 tbsp honey
Combine all the ingredients in a medium bowl and beat until smooth.


The pita was not the best vehicle to show off how appetizing the cream cheese really is, but it was all I had at the time. It really was tasty. Unless you eat a ton of cream cheese, I would suggest making half the recipe. Pumpkin doesn't last too long once you open the can. I ate this all week and it was on its last legs.

As a total aside, here's what you can do with leftover pumpkin -  measure it out into freezer bags (I usually do it 1/2 a cup at a time), squish it flat to get out most of the air and stack it in the freezer to save some space. It comes out a bit wetter than it went in but, otherwise, it's just as good to use in any recipe you might have. 


What to you when you have canned fruit or vegetables from a recipe?

Thursday, October 20, 2011

Serious Sweets: Pumpkin

My apologies to those of you linking over from Serious Eats and getting a Blogger error message. I've reposted the recipe, etc here for you. I hope you enjoy!

Originally posted September 19, 2011

I love pumpkin. I don't really know what it is about it that I love so much. For as long as I can remember, pumpkin pie has been one of my favorite foods. Every year I look forward to the Fall. Nothing goes with cool weather like pumpkiny treats. It's probably the spices that make everything so tasty, but I love it nonetheless. 


I've already posted one pumpkin recipe this season. On with number two - pumpkin cranberry cinnamon rolls from King Arthur Flour. This is the first recipe I've featured on here that uses yeast. I'll admit, I don't use it very often. It's as intimidating to me as pie crust (which I'll have to try soon) but I made this recipe once a couple of years ago and I knew the time and effort required was worth it for the results.


We all learn from our mistakes, right? The first time I made these I messed up big time. The King Arthur recipe calls for instant yeast and I used yeast from the Bulk Barn that must have been regular yeast. Poor choice. Since I hadn't dissolved the yeast in anything there were little bits left in the dough and it didn't rise well. This time, even though I was using instant yeast, I dissolved it for a few minutes in 1/4 cup of slightly warmed milk (substituted for the water and milk powder) before adding it to the rest of the wet ingredients.


Kneaded dough

The yeast definitely did its job this time. I left the dough to rise for a little more than an hour and it more than doubled in size. I added the post-it after a few minutes so I could mark where the dough started out.


Before rising


After rising

The recipe calls for the dough to be rolled up along the short edge and cut into nine rolls. I found this made for HUGE cinnamon rolls so I cut it in half to make 18 smaller rolls. I also decided to add cranberries to half and leave the second half plain. 


There was a lot of room left in between the rolls when I put them into a parchment lined 13"x9" pan. I was a little concerned that they weren't going to fill the pan but, after the second rising, everything looked great. 


Before the second rising - lots of empty space


After the second rising - nice and snug

Since I made smaller rolls, I reduced the baking time to about 20 minutes at 350 degrees. 


The finishing touch to these pumpkin beauties was the simple icing on top. 
  • 1 cup glazing or confectioners' sugar
  • 1 tablespoon butter
  • 1 1/2 tablespoons milk, or enough to make a "drizzlable" glaze
I had some maple syrup in the fridge so I substituted half of the milk with syrup. I don't think it really added anything to the taste, so don't worry about trying to fancy it up. 


Yum


All in all, these took about three and a half hours to complete but I think they're definitely worth it. To quote one of my co-workers/taste testers, Andra - "That was, without a doubt, the absolute best cinnamon roll I have had the privilege of eating. EVER." If you're looking for a twist on a basic recipe, I recommend you give these a try. 

What's the one seasonal food you look forward to most?

Monday, October 17, 2011

Chocolate Pretzel Cookies

I ventured out to the 'burbs last weekend and found myself at Sobey's in search of a deal. While I was there I picked up their in store magazine, Inspired, and found this recipe. I'm always looking for cookie recipes with a twist and these seemed to fit the bill - chocolate pretzel cookies. A pretty classic cookie dough full of coconut, oats, chocolate chips and pretzel pieces.


Chocolate Pretzel Cookies
Sobey's Inspired Magazine, Fall 2011
Makes 30 (using a tablespoon sized scoop, I got over 50)

1 cup butter
3/4 cup brown sugar, firmly packed
1/2 cup sugar
1egg
1 tsp vanilla
1 1/2 cups flour
1 cup shredded coconut
1/2 cup large flake oats (not instant or quick oats)
1 tsp baking soda
Pinch of salt
1 cup pretzels, broken into pieces
1/2 cup chocolate chips
1/2 cup puffed rice cereal
  • Preheat oven to 375°F. Using a hand mixer or stand mixer with the paddle attachment on medium speed, cream together butter and sugars until light and fluffy, then add the egg and vanilla.
  • In a large bowl, combine flour, coconut, oats, baking soda and salt. Add the flour mixture to the butter mixture, and mix until combined. Blend in pretzels, chocolate and cereal until just combined.
  • Drop rounded tablespoons of dough onto parchment-lined baking sheets. Bake in centre of oven, 8 min. for chewy cookies, 10 min. for crisp ones. Cool on wire racks.

  
These were really easy to pull together. Really no more difficult than a regular chocolate chip cookie, but a little more interesting. I did alter the recipe slightly. I didn't have any puffed rice cereal so I added an extra half cup of oats. I also added an extra 1/4 cup or so of chocolate chips. Once I put in the half cup it didn't seem like nearly enough for the amount of dough in the bowl so I threw in another handful. Sometimes baking isn't all about following the directions.


I would certainly make these again. The one issue I had was that they were really inconsistent. Some spread out flat and some didn't seem to spread out too much at all. My best guess is that, because of all the stuff in the dough, some didn't have enough dough to keep them together so they spread. Not really sure. They all tasted the same but some just looked ugly. Not a big deal in the grand scheme of things. 
Do you have any tricks to make a basic cookie stand out?

Wednesday, October 12, 2011

Wordless Wednesday: Thanksgiving

Before

After

Thanksgiving dinner for one

Related Posts Plugin for WordPress, Blogger...